That was a full day!
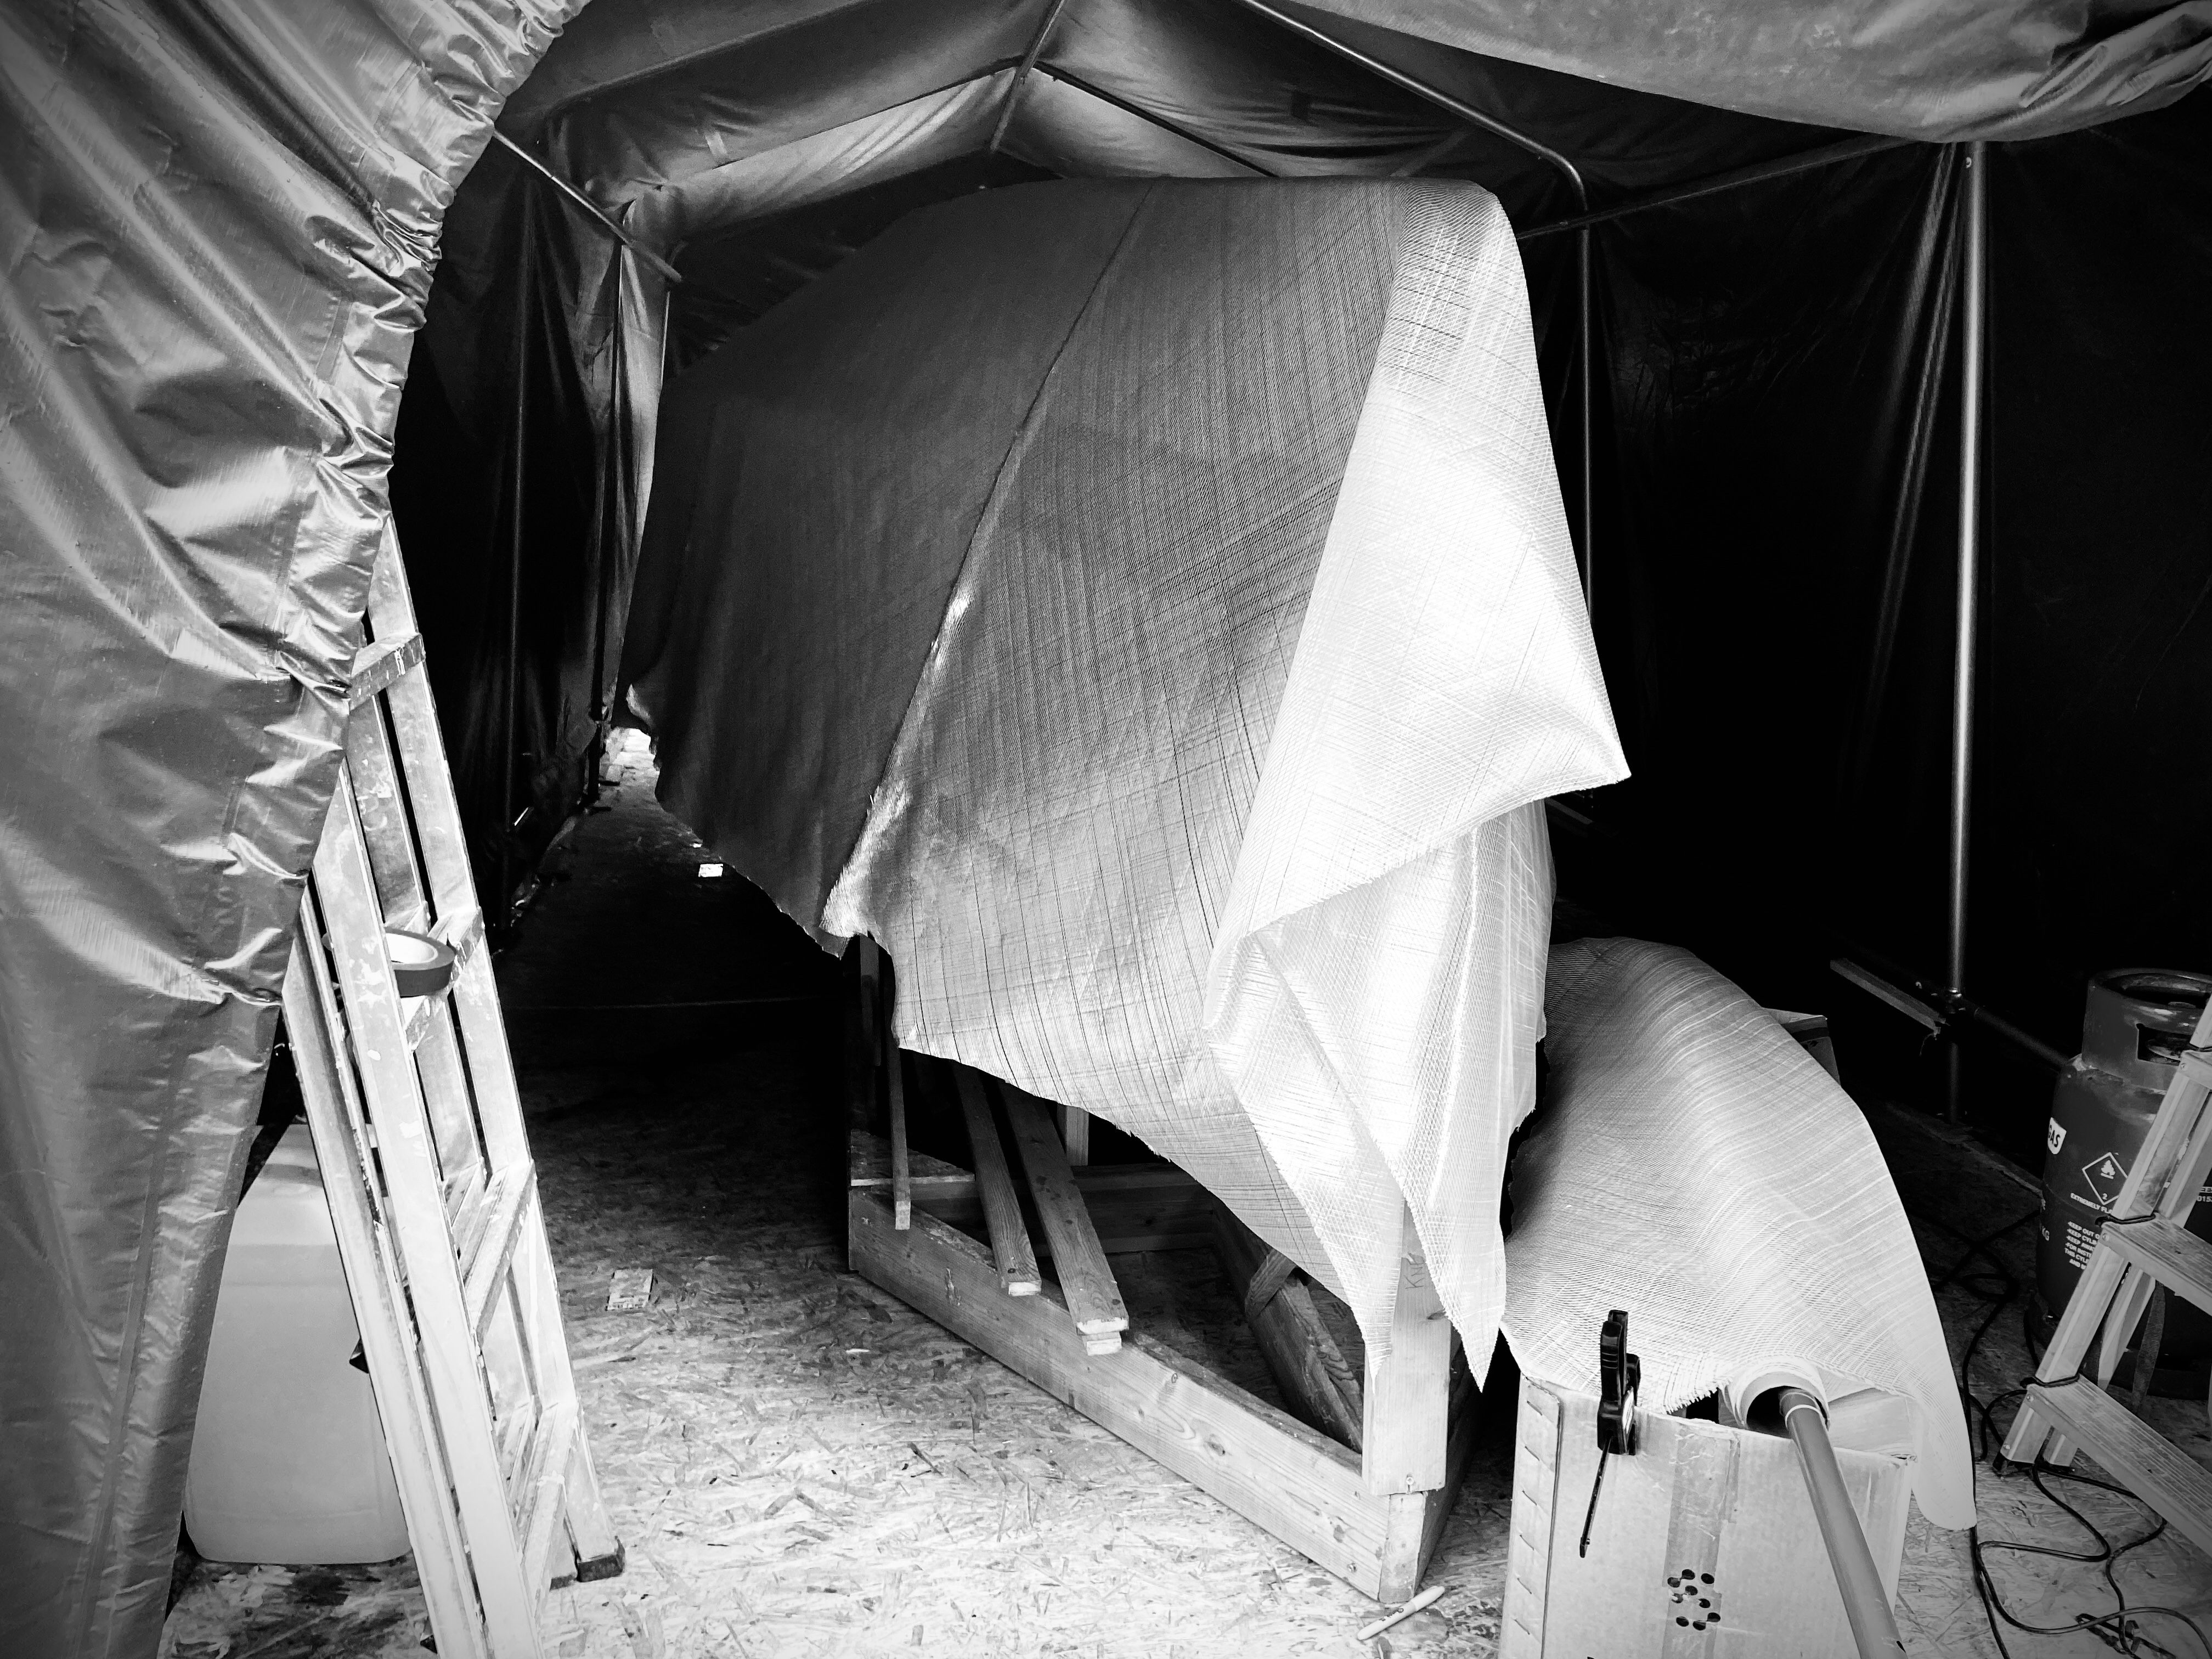
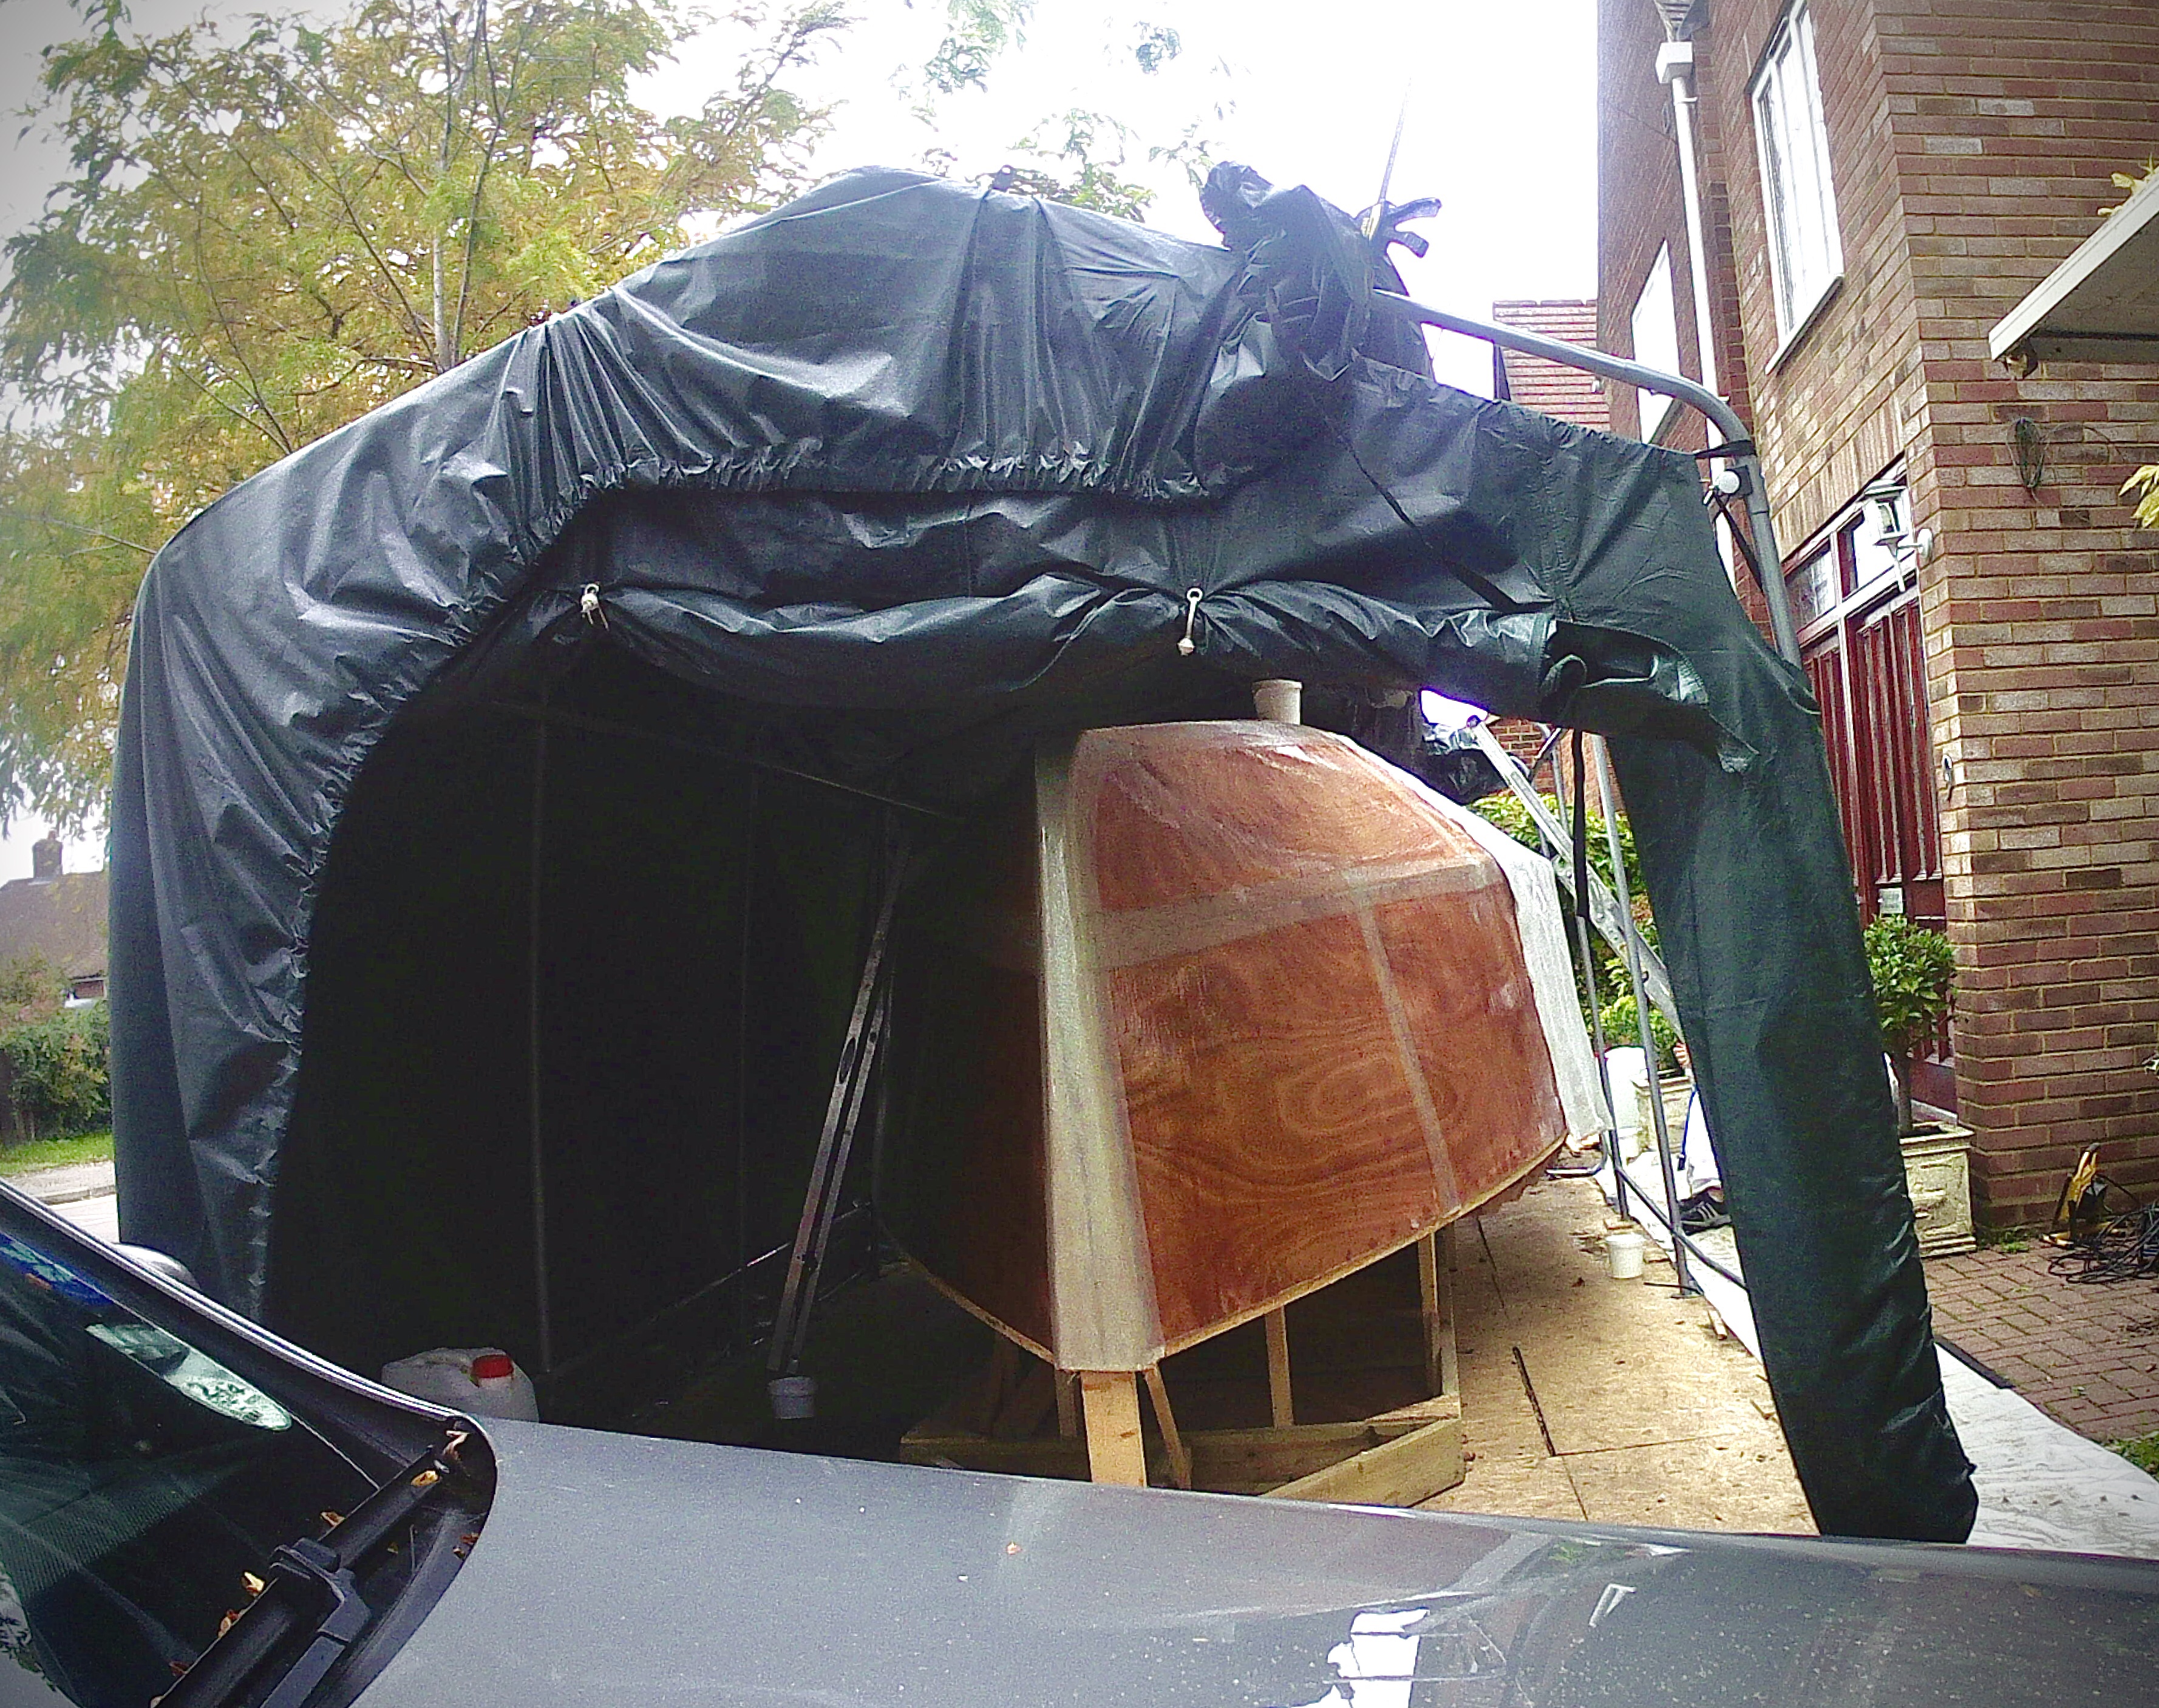
We had waited for a good weather day, low wind and no rain so that we could open up the tent side to give enough access to both sides of the boat.
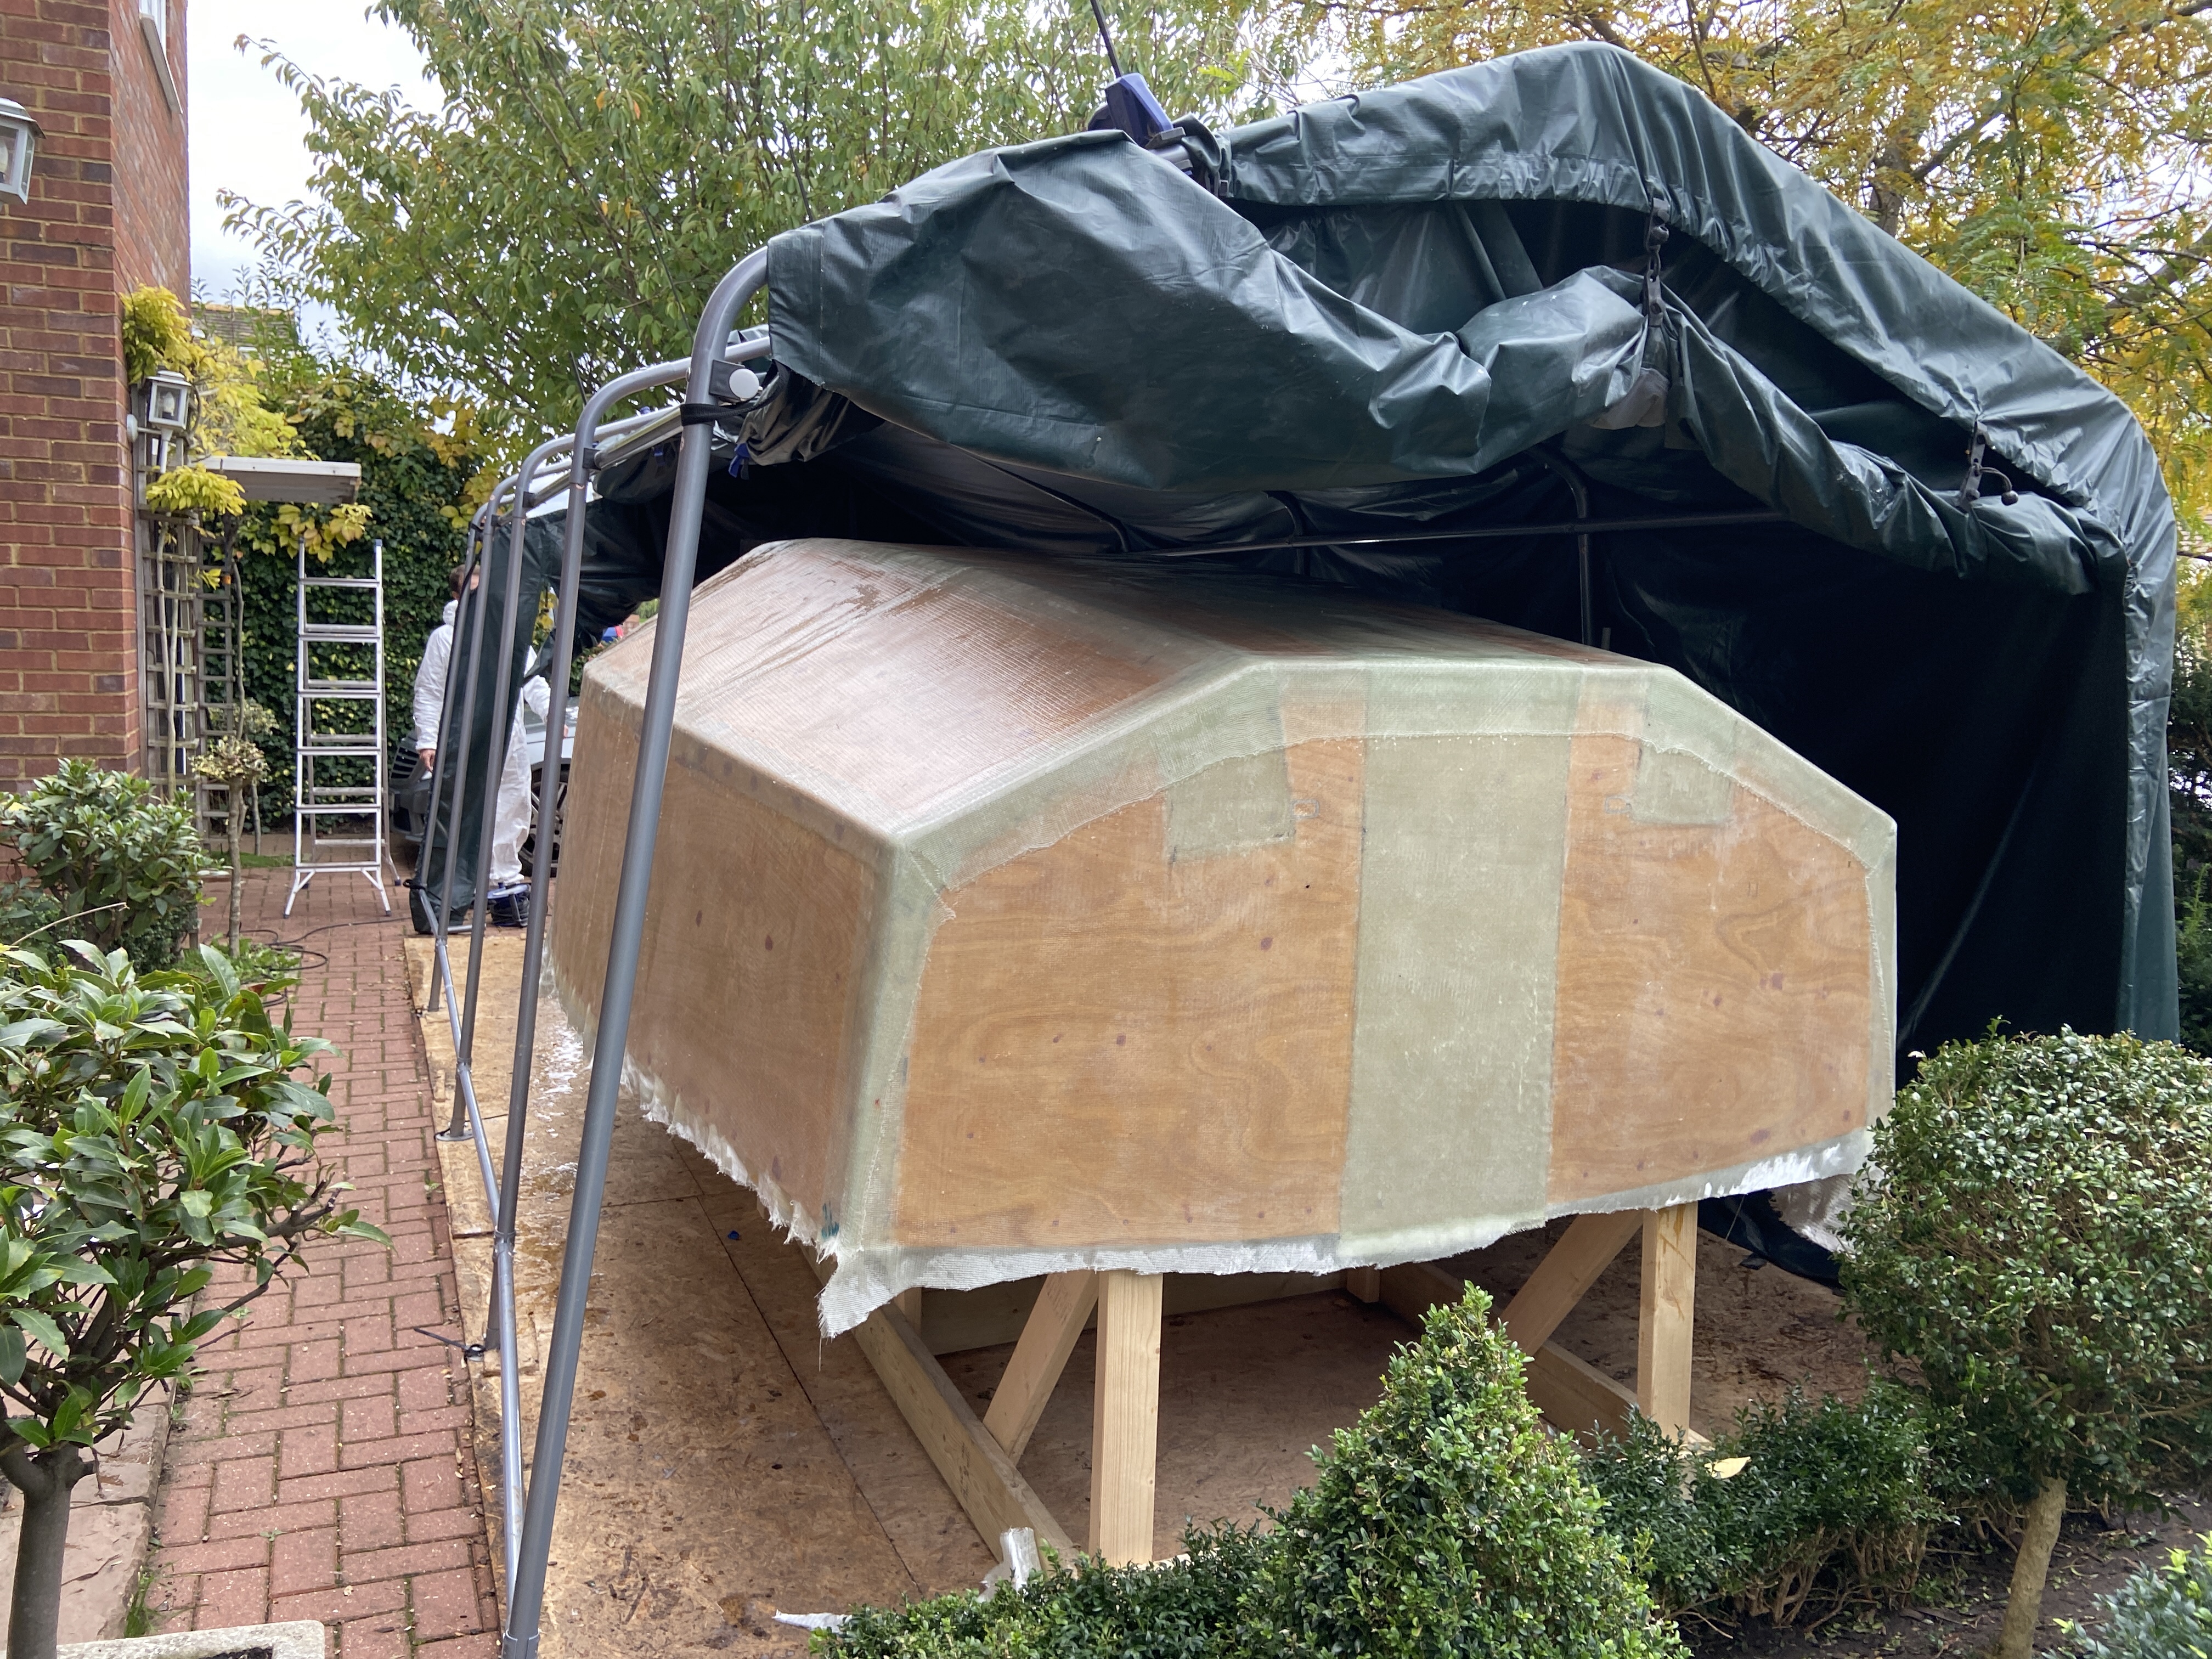
Our goal was to get the hull fully fibreglassed…..in one day. Over ambitious. To fully glass the boat we have to get three full layers on. First two layers of 450g biaxial and one of 300g to finish. We only managed to get the first 450g layer on but frankly this was a good effort with three of us working on it.
We had pre-cut all the glass during the week and laid them out on a bench in the order we would place them back on the boat. Labelling them by layer and position on the boat, so we would not be confused when we were “frazzled in action”. We had also cut the cloth so that the joints would be in different places for different layers.
Everything went well but took significantly longer than we anticipated, this was mainly from lack of experience rather than significant problems or errors. So what were the key points….
1. The 450g biaxial cloth is lovely. It looks and feels quality. However it does take a huge amount of resin to wet it out. I guess this is “logical” but you don’t realise until you start working it the impact this has on pure time. Both in terms of applying the resin to the fabric and letting it wet out but also just mixing the resin up in sufficient quantities.
2. We ended up weighing out the epoxy out rather than using the West System pumps. The pumps work well when you are making small amounts of resin up. However they are slow when working with large quantities.
3. We have started using the Fast Harder due to low ambient temperatures here. As the cloth soaks up large amounts of resin we were making quite large amounts ready to apply. However this will go off with 10mins or so if left in the container just from the heat it generates from its own exothermic reaction – so you need to work reasonably quickly and time the resin for when it’s needed…..but that is pretty much constantly unless you take a tea break.
4. We made a stirrer out of a bent coat hanger in a electric drill. Manually stirring all that resin just would not be practical.
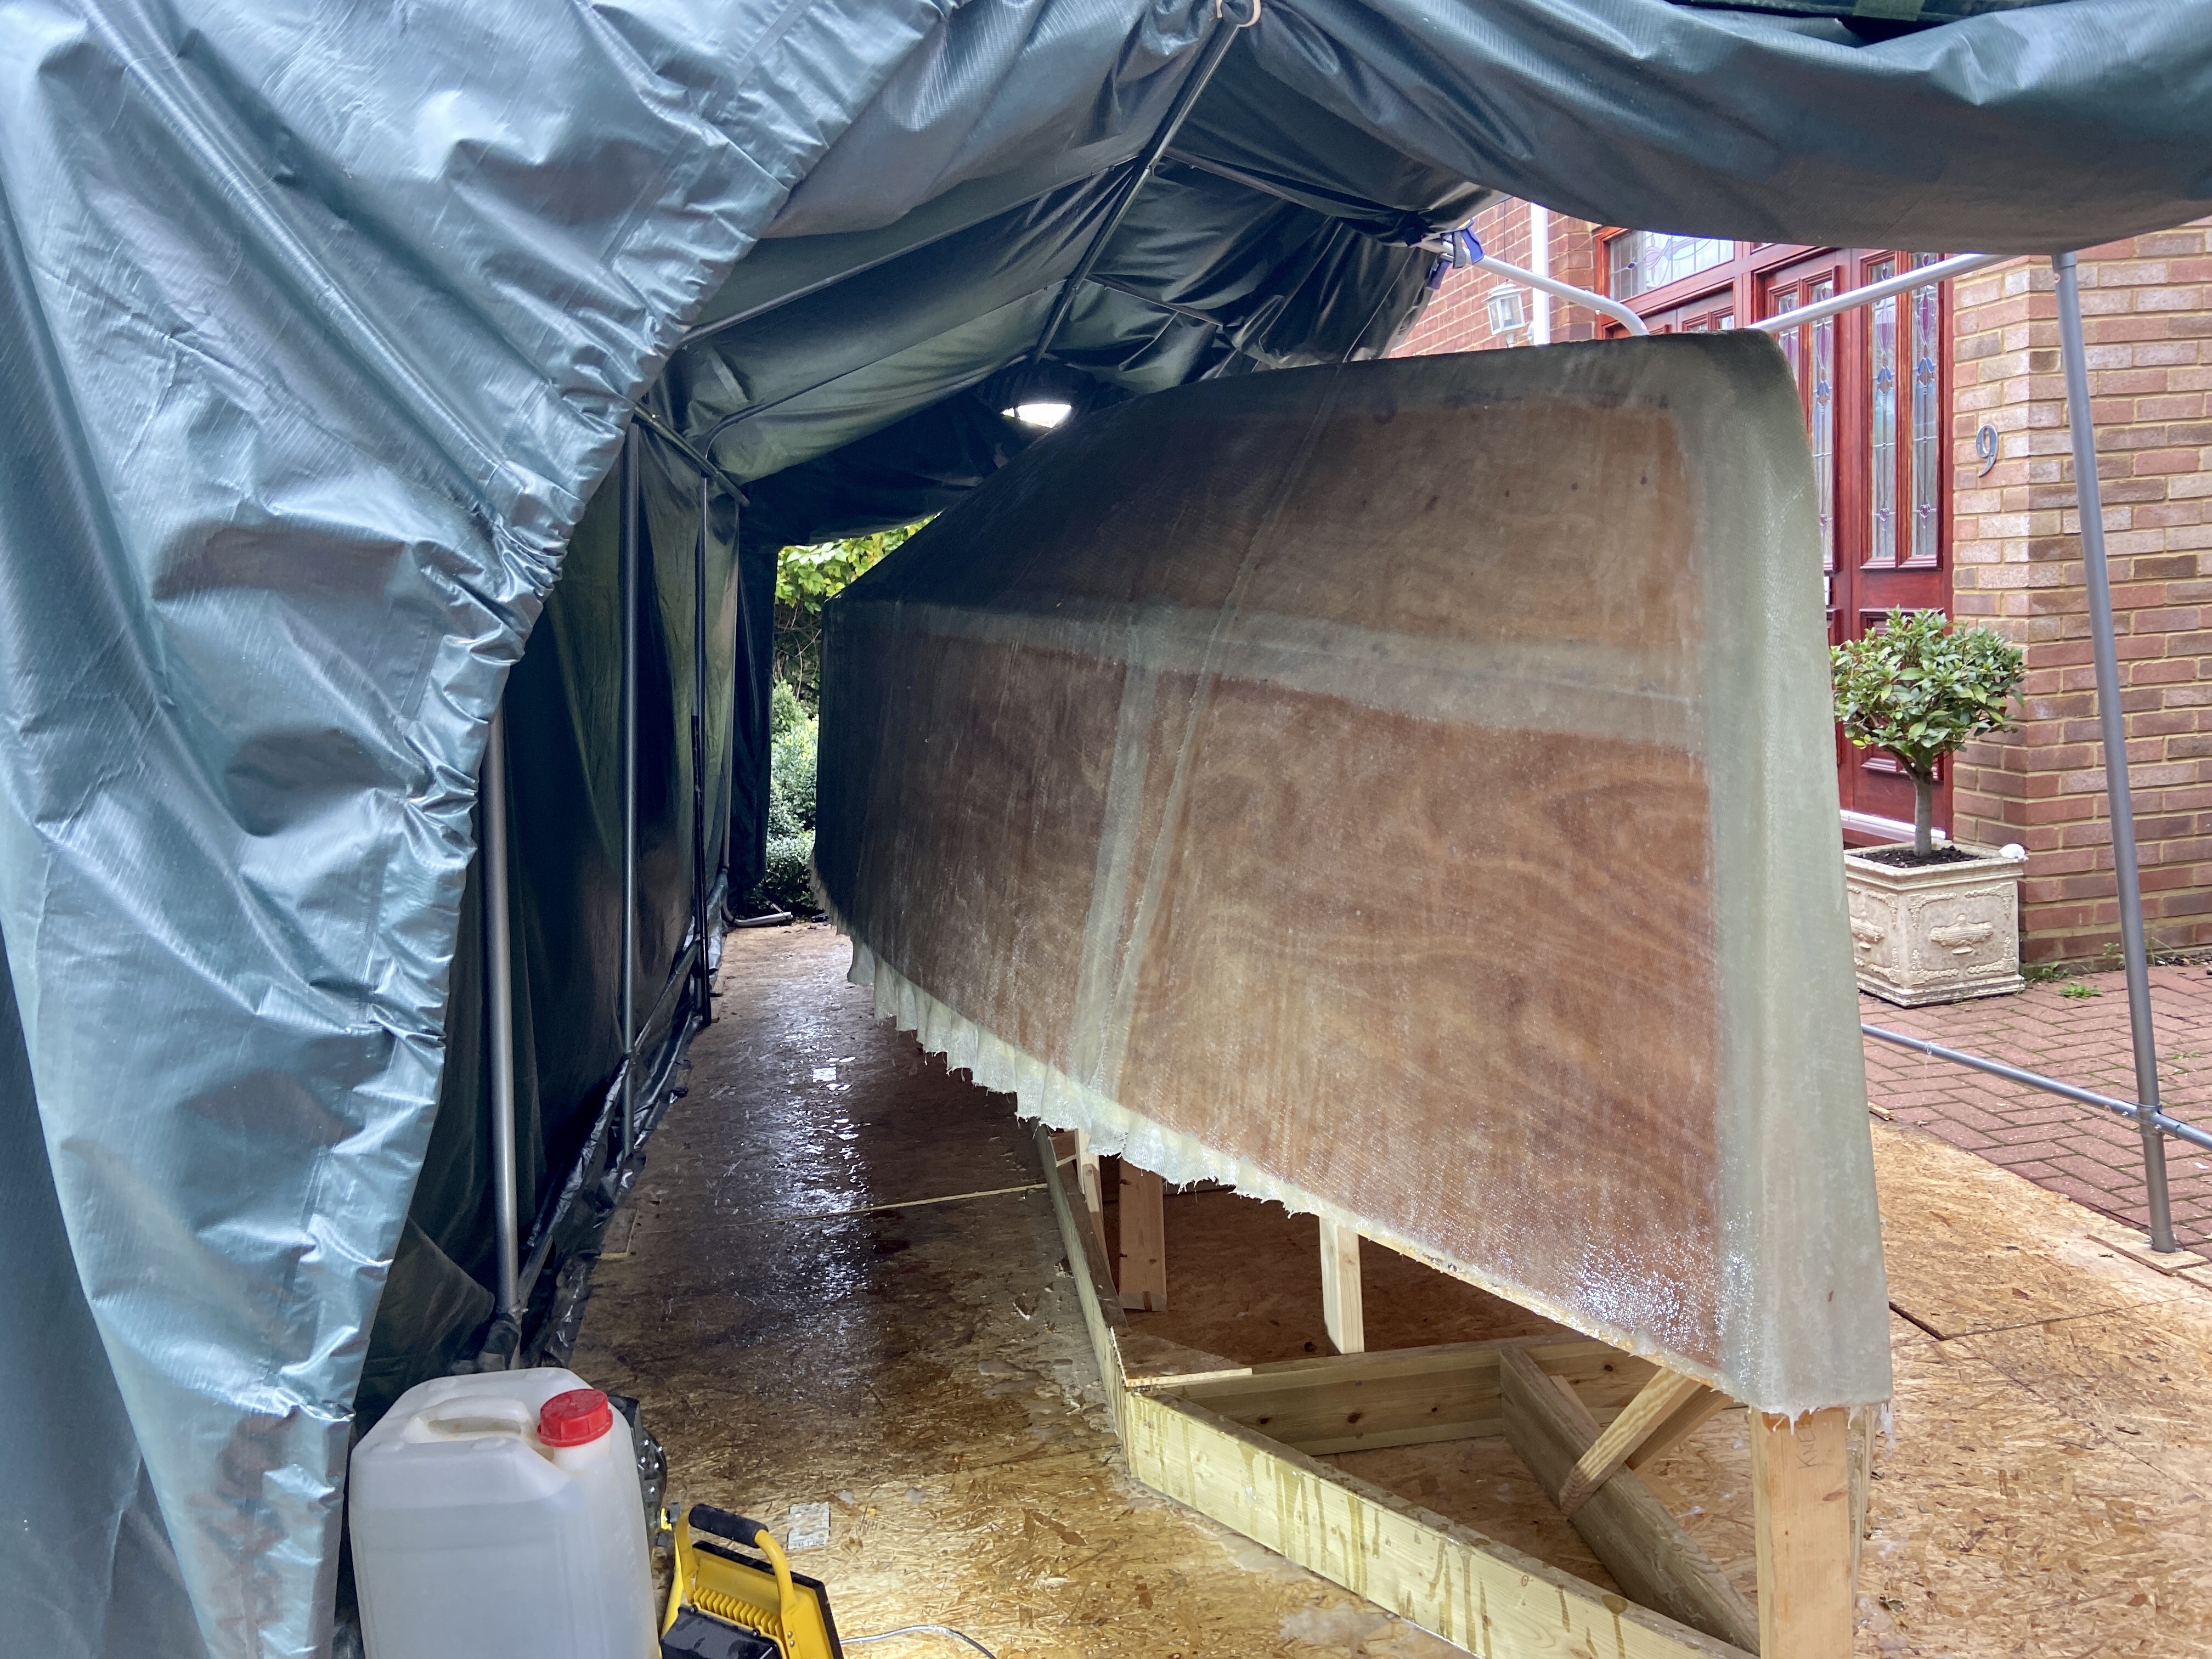
5. We wetted out the hull too far ahead. This meant that by the time we were applying the later strips of cloth the hull was extremely tacky. Which isn’t bad from a bonding perspective, however it means it’s extremely difficult to move the long heavy sheet of cloth into position. As it’s laid out across the hull it starts to tack down across its large surface area and it won’t slide. Next time we will try to apply the fabric earlier after wetting to ensure it will still be able to slide it into position.
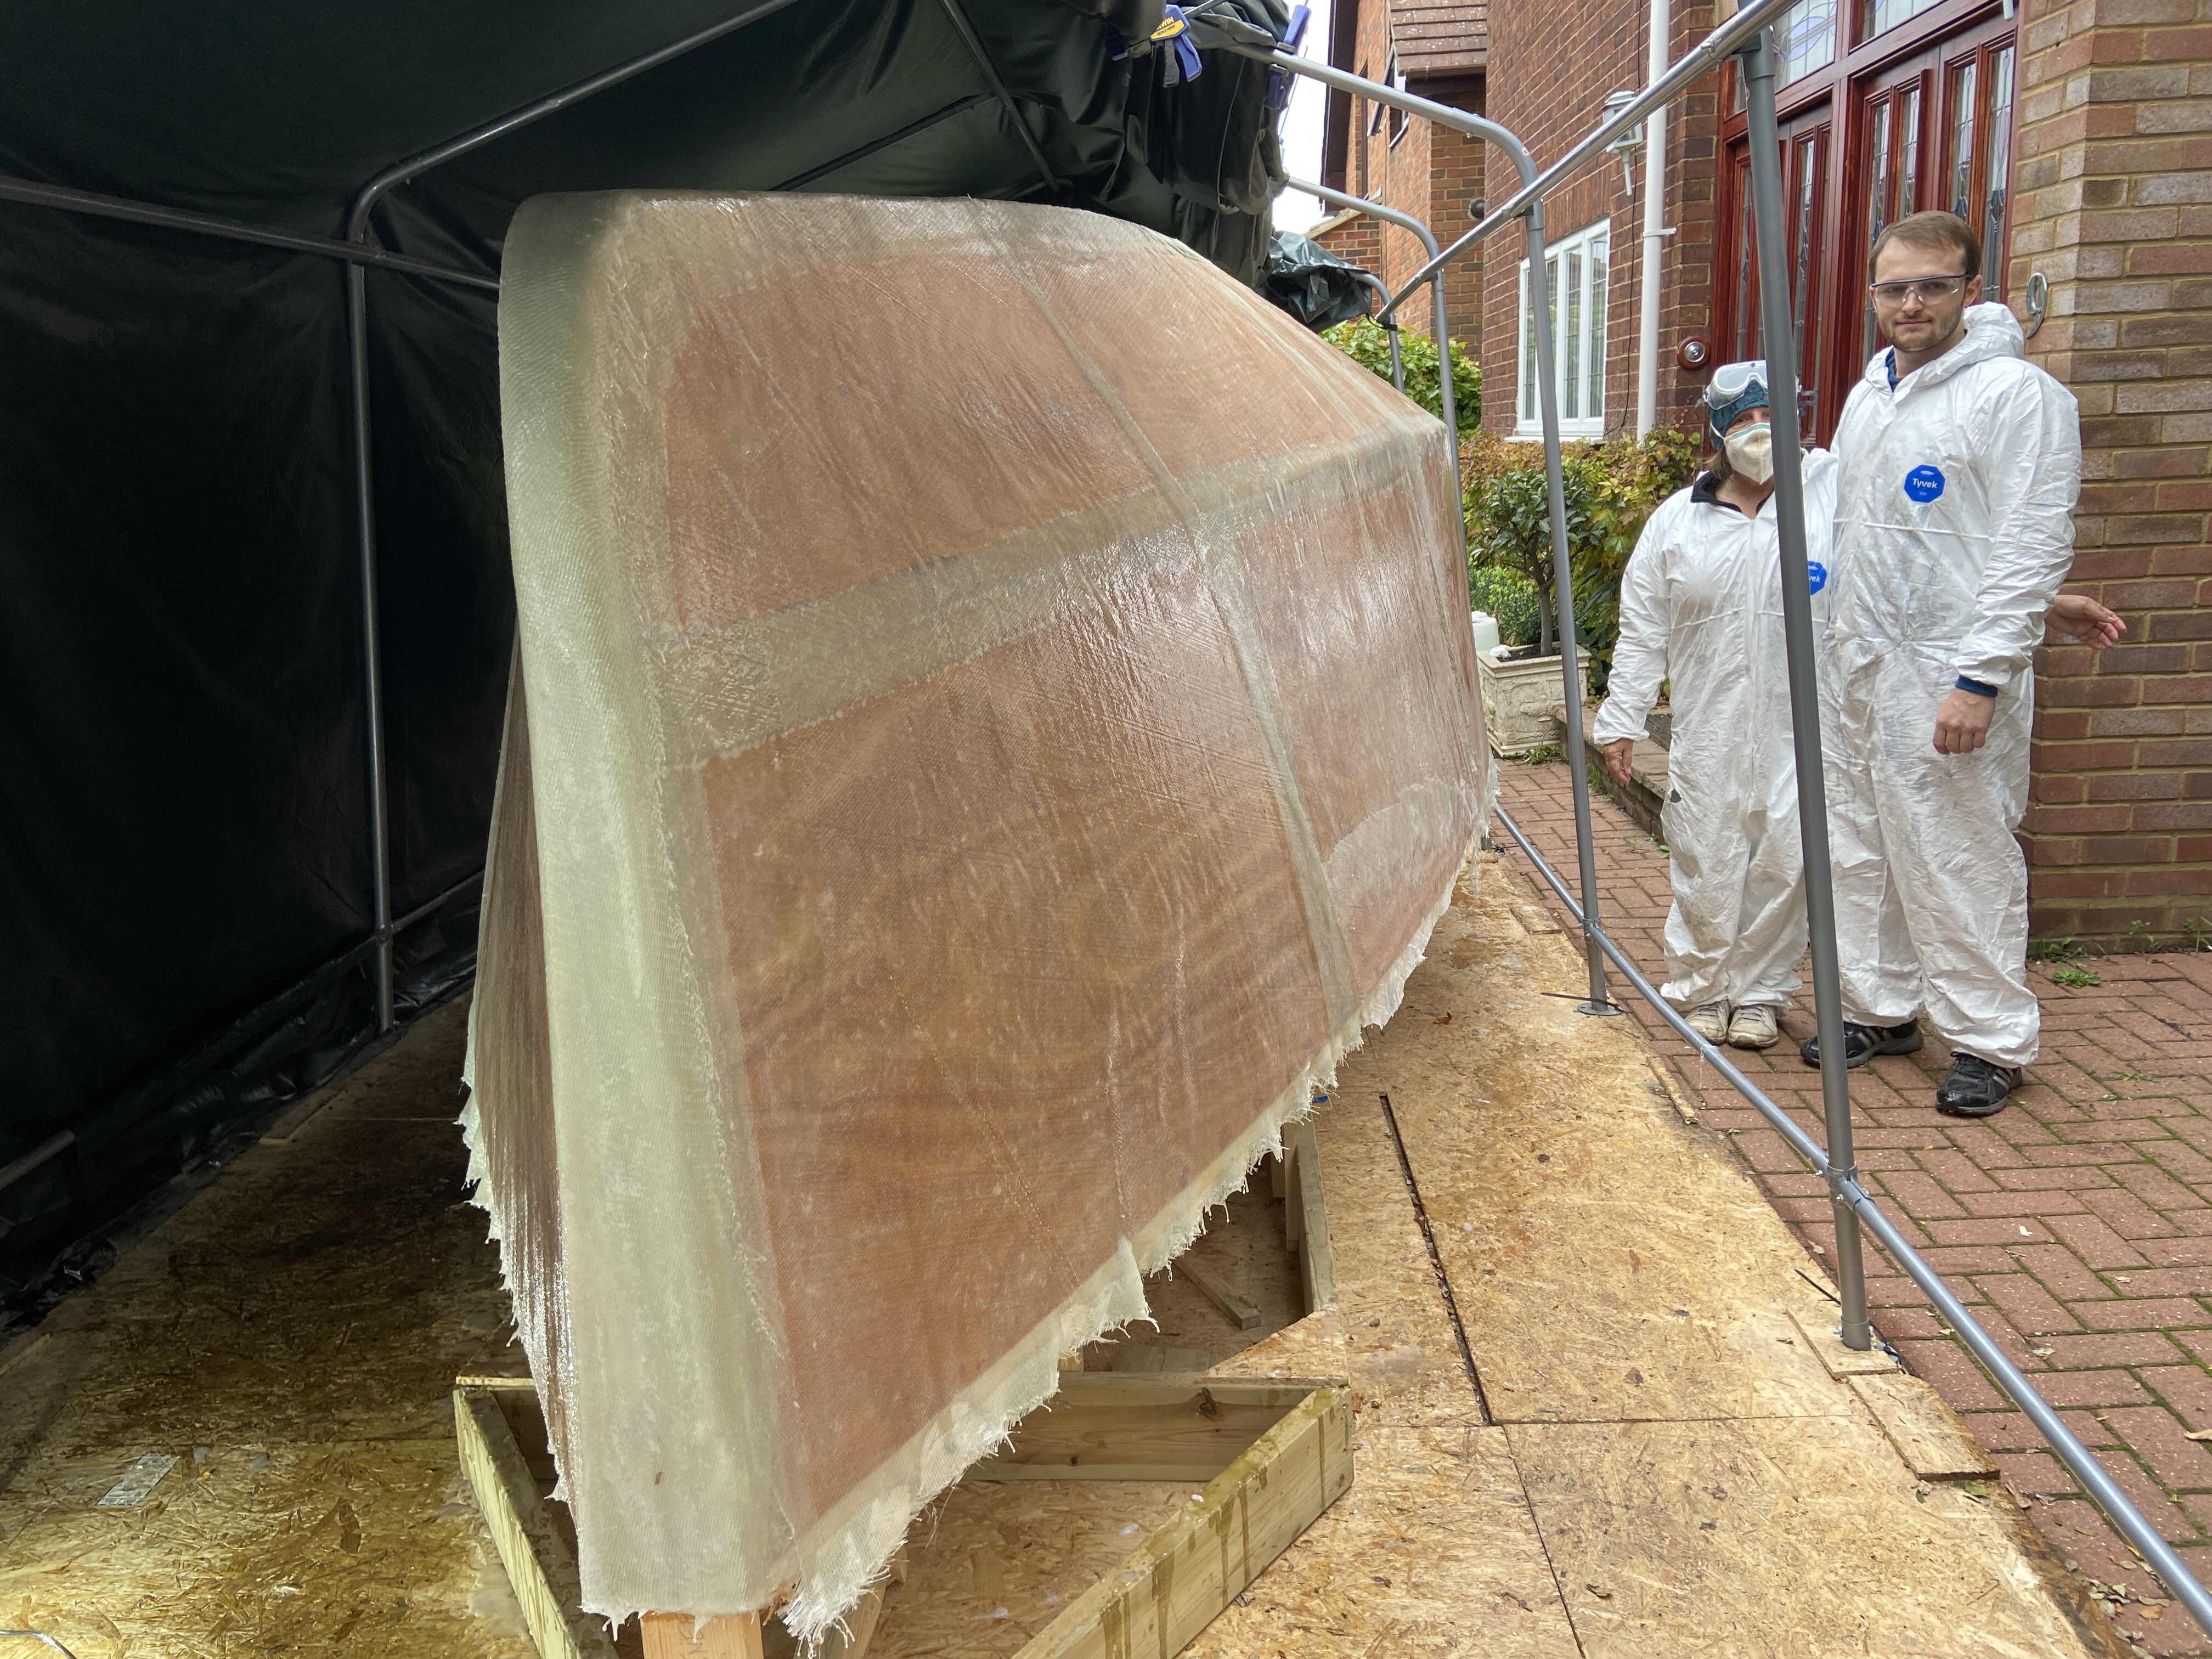
Really happy we have got the first layer on. I have a “bit” of sanding to do once the resin has cured so that we can get the mechanical bond for the next layer. However this will give me a chance to deal with any high spots or missed patches is we have any.
Great effort by the family…..much appreciated. We will go again to finish the other layers.
P.S…….it’s a good job we stopped when we did. It started to rain a while later, that wouldn’t have been good for our drying resin!


Hi Peter. I have been following your blog since you started and really enjoy the regular posts. Well done so far it looks great. especially like and admire the use of the tent. Keep going Good Luck. Tony
LikeLike
Tony. Thanks for your note. We’re having fun and learning a lot. That’s how adventures start I guess. Thanks again. Peter
LikeLike
Keeping up the pace and quality during not the best weather and limited space highly impressive. Wishing all the best for the rest of the fibreglassing. Richard
LikeLike
Cheers Richard! Making progress. Seeing the new Trekka pics are quite motivating…we will keep plodding on. Look forward to watching your build soon!
LikeLike